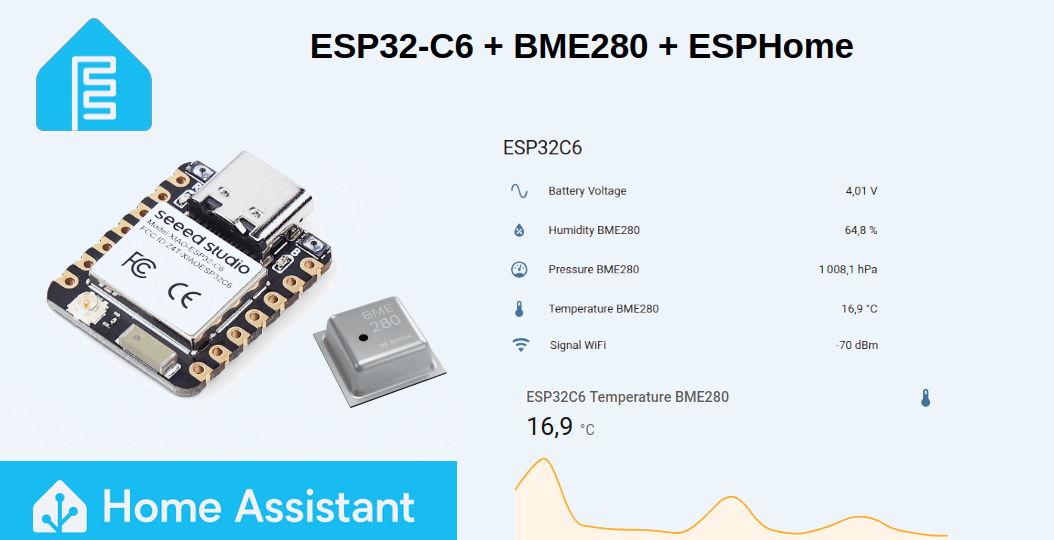
In my previous tutorial, “Create a battery-powered Zigbee temperature sensor with an ESP32C6,” I explained in detail how to program a temperature sensor, based on an ESP32-C6 microcontroller and a BME280 sensor, communicating via the Zigbee protocol with its Home Assistant server.
In this new tutorial, I’ll show you how to configure this sensor with ESPHome. This open-source firmware framework allows for simple configuration using YAML, requiring no programming skills whatsoever.
Since Zigbee support isn’t yet integrated into ESPHome, the sensor will communicate with the Home Assistant server via Wi-Fi.
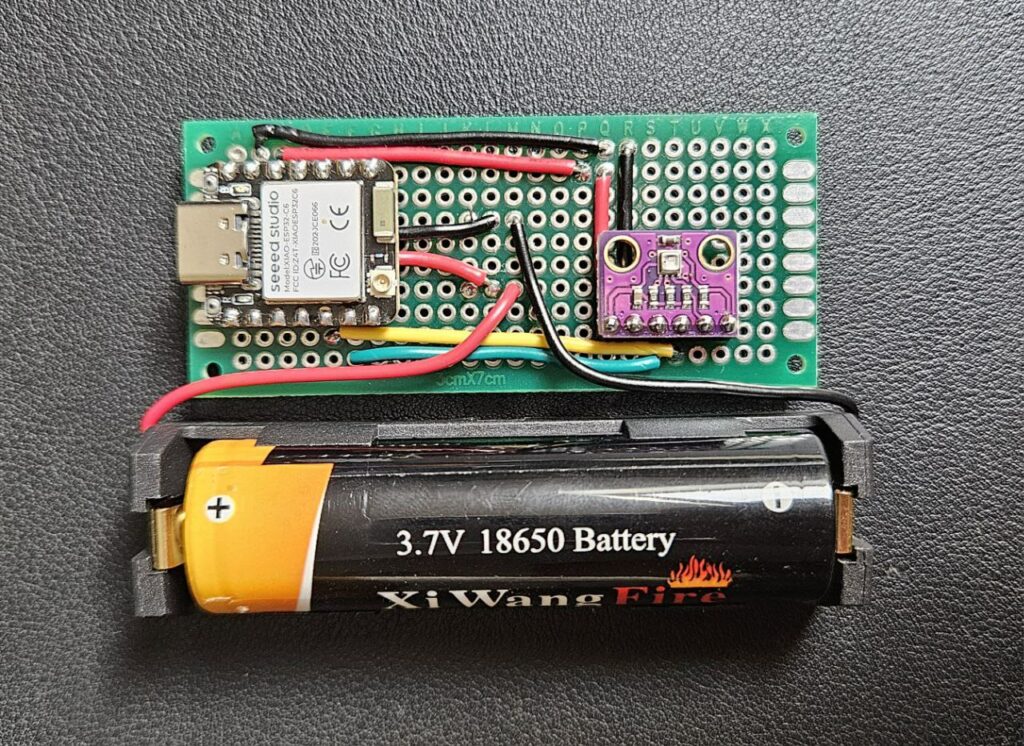
Because the sensor is battery-powered, I focused my efforts on optimizing its energy consumption.
Here’s the configuration that allows the sensor to record temperature, pressure, and humidity every 15 minutes, and then transmit this data to the Home Assistant server via Wi-Fi:
esphome:
  name: capteur-temp-esp32c6
  friendly_name: capteur-temp-esp32c6
esp32:
  board: esp32-c6-devkitc-1
  framework:
    type: esp-idf
# Enable logging only for warnings
logger:
  level: WARN
# Enable Home Assistant API
api:
  encryption:
    key: "your-key"
ota:
  - platform: esphome
    password: "your-pwd"
wifi:
  ssid: !secret wifi_ssid
  password: !secret wifi_password
  fast_connect: true  # Disable Wi-Fi scanning, direct connection to ssid
  on_connect:
    # Update sensors
    - component.update: bme280_measure
    - component.update: battery_voltage
    - delay: 5s  # Delay to ensure that data is sent to HA
    - deep_sleep.enter: deep_sleep_1
switch:
  - platform: gpio
    pin: GPIO3
    id: rf_switch
    name: "RF Switch"
    internal: true
    restore_mode: ALWAYS_OFF
  - platform: gpio
    pin: GPIO14
    id: antenna_select
    name: "Antenna Select"
    internal: true
    restore_mode: ALWAYS_ON # Uses external antenna
i2c:
  sda: GPIO22
  scl: GPIO23
  scan: False
sensor:
  - platform: bme280_i2c
    id: bme280_measure
    temperature:
      name: "Temperature BME280"
    pressure:
      name: "Pressure BME280"
    humidity:
      name: "Humidity BME280"
    address: 0x76
    update_interval: never
  - platform: adc
    pin: GPIO0
    name: "Battery Voltage"
    id: battery_voltage
    update_interval: never
    attenuation: 12db  # For ADC inputs > 1.1V (extends range to ~2.45V)
    filters:
      - multiply: 2.0  # Voltage divider (div 2) compensation
# Deep sleep configuration to save power
deep_sleep:
  id: deep_sleep_1
  sleep_duration: 15min  # Sleep duration between wake-ups
Optimizing Wi-Fi configuration
In this ESPHome configuration, setting fast_connect to true disables Wi-Fi network scanning, thus speeding up the connection to your network:
fast_connect: true # Disable Wi-Fi scanning, direct connection to ssid
The on_connect block allows actions to be executed as soon as the Wi-Fi connection is established. The component.update instruction triggers the update of the relevant sensor. Therefore, the BME280 measurements and battery voltage are automatically updated thanks to this configuration:
on_connect:
  # Update sensors
  - component.update: bme280_measure
- component.update: battery_voltageThis update is followed by a 5-second delay, the time required for the sensor to transmit its data to the Home Assistant server via Wi-Fi. The ESP32C6 then enters deep sleep mode to minimize battery consumption.
- delay: 5s # Delay to ensure that data is sent to HA
- deep_sleep.enter: deep_sleep_1 Deep sleep configuration
Deep sleep is generally configured by two parameters:
- run_duration : The duration for which the ESP32-C6 must be active, i.e., executing code.
- sleep_duration : The duration for which the ESP32-C6 remains in deep sleep mode.
Here, only the sleep_duration parameter is configured. Indeed, the activity duration should not be defined if you want the ESP32-C6 to enter deep sleep mode via the deep_sleep.enter instruction.
# Deep sleep configuration to save power
deep_sleep:
id: deep_sleep_1
sleep_duration: 15min # Sleep duration between wake-upsMeasuring Wi-Fi signal strength
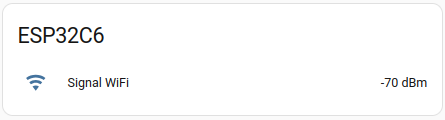
To confirm that the sensor is receiving a good Wi-Fi signal, it is useful to configure the RSSI reporting in Home Assistant.
This information is provided by ESPHome and is measured in dBm. To obtain it, simply declare the wifi_signal sensor in the ESPHome configuration:
sensor:
- platform: wifi_signal
name: "Signal WiFi"
id: wifi_signal_strength
update_interval: never The measurement is refreshed when the ESP32-C6 is connected to the Wi-Fi network:
wifi:
ssid: !secret wifi_ssid
password: !secret wifi_password
fast_connect: true # Disable Wi-Fi scanning, direct connection to ssid
on_connect:
  # Update sensors
  - component.update: bme280_measure
  - component.update: battery_voltage
- component.update: wifi_signal_strength
- delay: 5s  # Delay to ensure that data is sent to HA
- deep_sleep.enter: deep_sleep_1 External antenna configuration
As explained in the ESP32C6 Getting Started guide, enabling the external antenna requires specific configuration. By default, the ESP32C6 uses its internal ceramic antenna for Wi-Fi.
The choice between the internal and external antennas is made via GPIO14.
- GPIO14 in low state (default setting): the device uses the integrated ceramic antenna.
- GPIO14 high: the device switches to the external antenna.
For this selection to take effect, GPIO3 must first be set low, which activates the RF switch control.
Example of configuration using external antenna :
switch:
  - platform: gpio
    pin: GPIO3
    id: rf_switch
    name: "RF Switch"
    internal: true
    restore_mode: ALWAYS_OFF
  - platform: gpio
    pin: GPIO14
    id: antenna_select
    name: "Antenna Select"
    internal: true
restore_mode: ALWAYS_ON # Uses external antennaTo configure use of internal antenna you must set restore_mode for GPIO14 to ALWAYS_OFF.
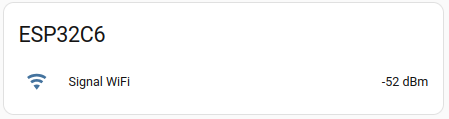
The RSSI sensor in Home Assistant confirms the clear benefits of the external antenna, showing a consistent 10-20 dB improvement.
Power consumption
The following picture illustrates the sensor’s power consumption when it wakes up from sleep, takes measurements, transmits them to the Home Assistant server via Wi-Fi, and then returns to deep sleep.
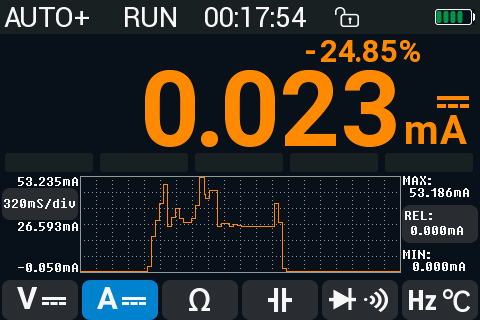
When the sensor is active and transmitting its data to the Home Assistant server via Wi-Fi, its power consumption fluctuates between 25-54 mA. When the ESP32C6 is in deep sleep mode, its power consumption is reduced to 23 μA.
You can have a look to my other ESPHome tutorials Integrate a reTerminal E1002 into Home Assistant with ESPHome and Home Assistant: Displaying weather data on a reTerminal E1001 with ESPHome.
I hope you found this tutorial helpful. Feel free to share your feedback by clicking on the stars below or leaving a comment.
I wonder if the 10 seconds up time for the sensor could be reduced.
just try, depends on link establishment speed probably.
Nice project,
but not sure if it´s worth it a the present price of zigbee/thread temperature+humidity devices.
Altogether costs more than 10 eur, when for 3 eur you can get a native device which battery lasts x3 longer than with esp32
Objective of my tutorials is to learn, not to be competitive with market products 🙂
Did you know….? That many ESP32 chips have an internal temperature sensor?
I use it to get an indication of temperature around my house…
“`
globals:
id: temp_offset
type: float
restore_value: true
initial_value: “0.0”
sensor:
– platform: internal_temperature
id: temp1
name: “CPU Temperatuur”
accuracy_decimals: 1
filters:
– lambda: return x + id(temp_offset);
– round: 1
– delta: 0.5
number:
platform: template
id: temp_offset_number
name: “CPU Temperatuur correctie”
min_value: -60.0
max_value: 10.0
step: 0.1
restore_value: true
optimistic: True
on_value:
then:
– globals.set:
id: temp_offset
value: !lambda ‘return x;’
– component.update: temp1
“`
[…] result aligns with typical ESP32 Wi-Fi performance in embedded IoT setups like ESPHome, where 7-8 Mbit/s is realistic for localhost transfers under optimal […]