Power over Ethernet (PoE) allows you to power your Raspberry Pi (Raspberry Pi 4 Model B or Raspberry Pi 3 Model B+) via its Ethernet connector. The Ethernet cable will thus be used to transport data as well as to power the Raspberry Pi.
Powering a Raspberry Pi by PoE can be very practical when the Raspberry Pi must be installed in a location without an electrical outlet. Knowing that an Ethernet cable can have a length of 100 meters this can be an interesting solution in addition to being elegant.
I invite you to start reading my article about Power over Ethernet (PoE).
A PoE switch (or injector) is required
It is necessary to use a switch (Switch) supporting the PoE standard. This type of switch can deliver 15 W via the Ethernet cable and thus properly power the Raspberry Pi.
Some switches support the new PoE+ standard, which can deliver 30 W. But be careful, you will have to use a PoE HAT compatible with this new PoE+ standard as well. Of course it works without problem if you have a PoE+ switch and a PoE HAT. The switch will detect that the PoE HAT does not support the PoE+ standard and use the PoE standard.
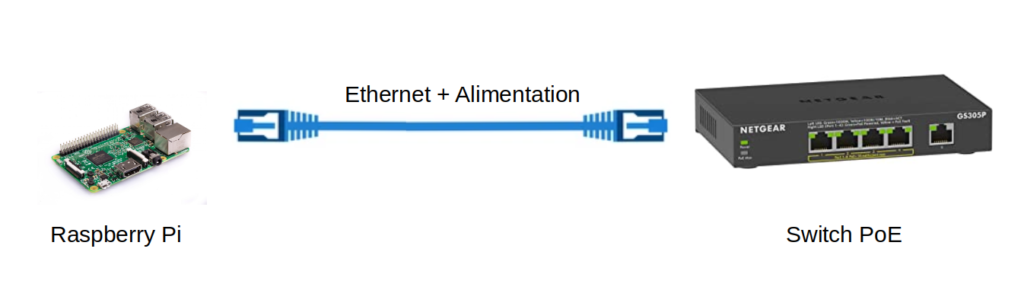
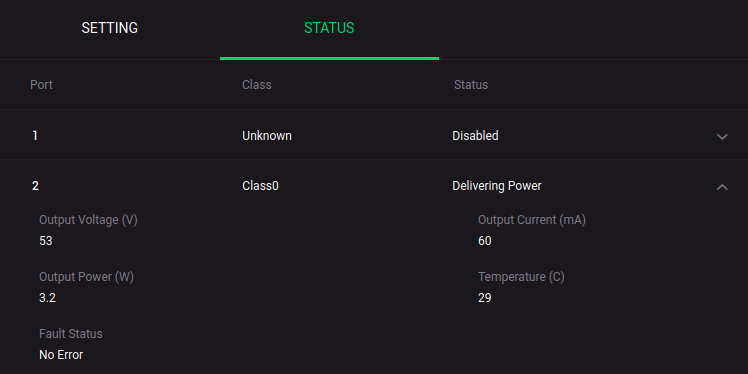
In my tutorial I use the Switch Netgear GS305EP. This 5-port switch is compatible with the PoE+ standard. It provides interesting information on the PoE status, such as the power delivered on each port.
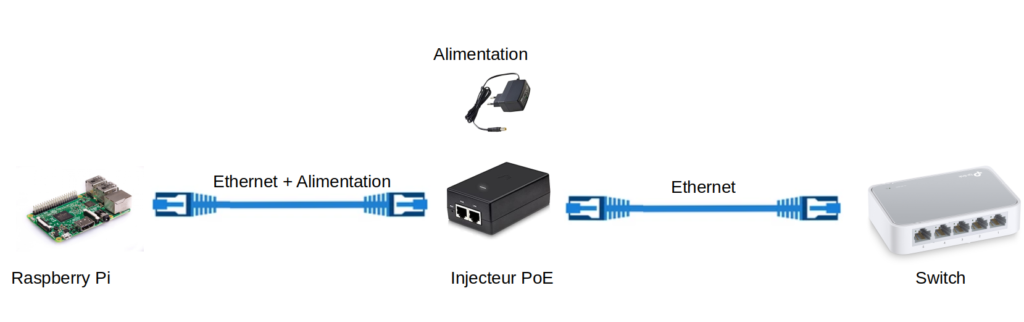
However, if you do not have a PoE compatible switch, you can use a PoE injector.
Raspberry Pi 4 Model B PoE pins
I invite you to read the chapter on the power supply diagram of my article on PoE in order to understand this part.
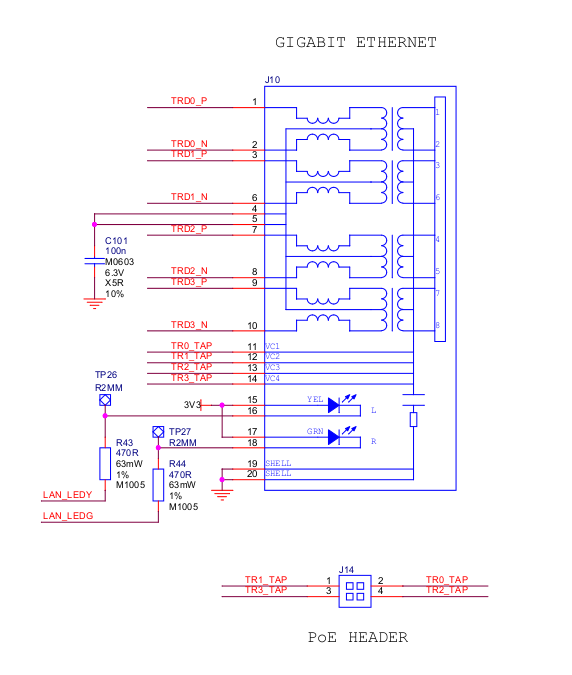
The Raspberry Pi 4 Model B uses an RJ45 connector reference Trxcom TRJG0926HENL, here is the internal diagram:
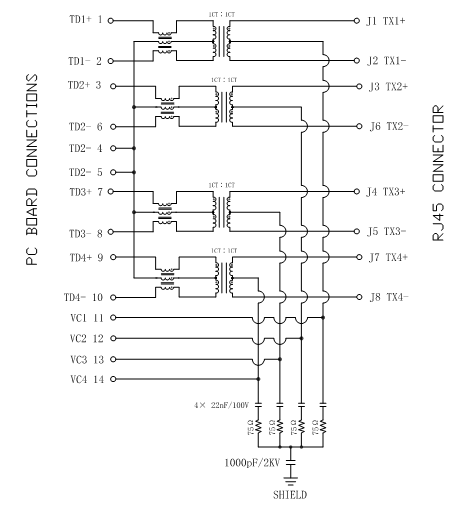
The 4 central sockets of the coupling transformers (VC1..VC4) of the RJ45 connector are connected to the 4-pin J14 (PoE) connector of the Raspberry Pi.
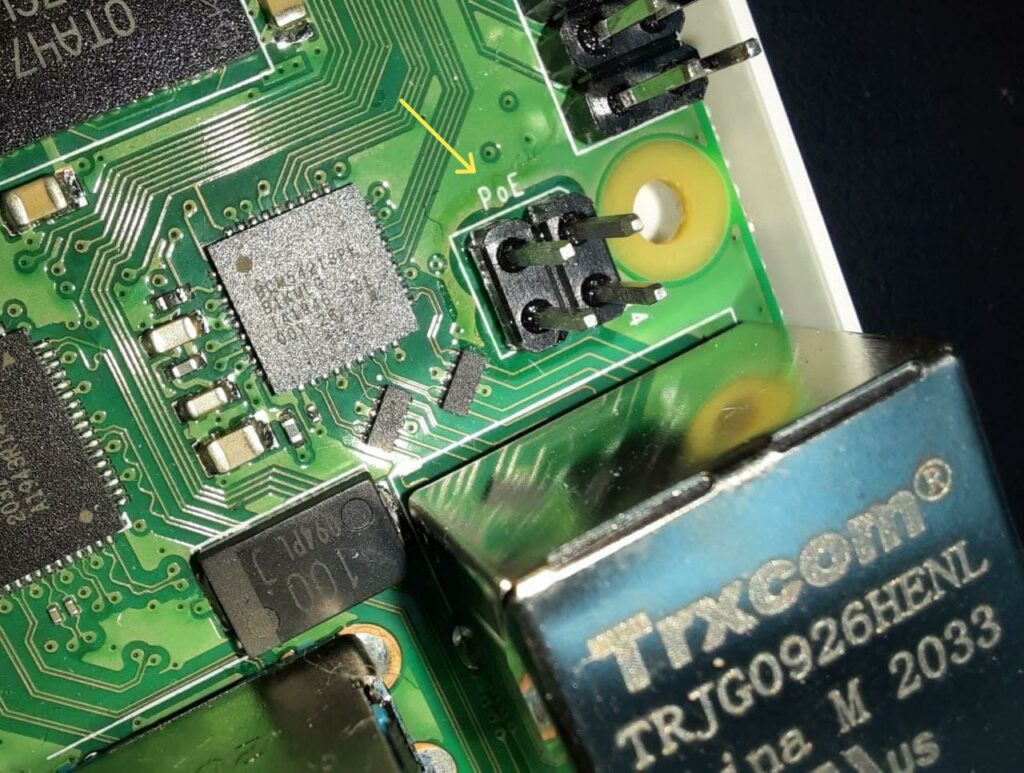
The J14 (PoE) connector is clearly visible on the Raspberry Pi 4, it is located just behind the Trxcom RJ45 connector.
Depending on the mode used by the PSE (equipment that provides PoE power), the current will be delivered on different pins of the J14 connector. The following table shows the polarity of the wires of the Ethernet cable according to the PoE mode used.
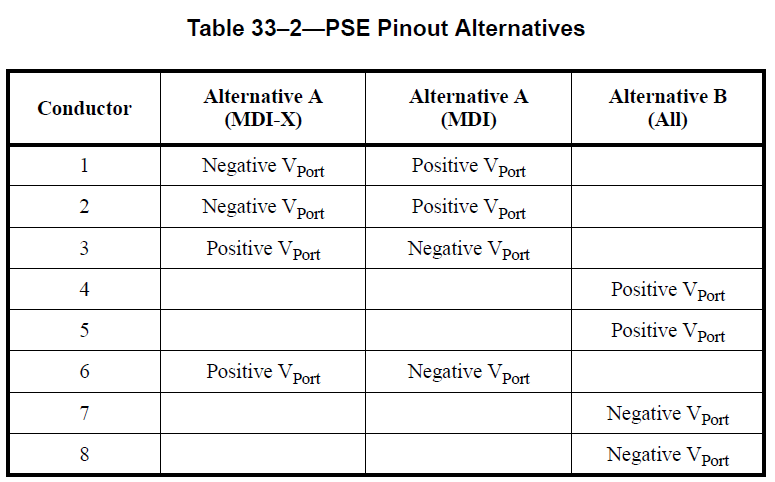
For example the Netgear switch uses alternative A (MDI-X). It will therefore provide PoE current on pairs 1-2 and 3-6, with negative polarity on pair 1-2 and positive polarity on pair 3-6. Since pin 1 (TR1_TAP) of the PoE connector is connected to the center tap of pairs 3-6, and pin 2 (TR0_TAP) of the PoE connector of the Raspberry Pi is connected to the center tap of pairs 1-2, the voltage PoE will be delivered on pins 1 (+) and 2 (-) of connector J14.
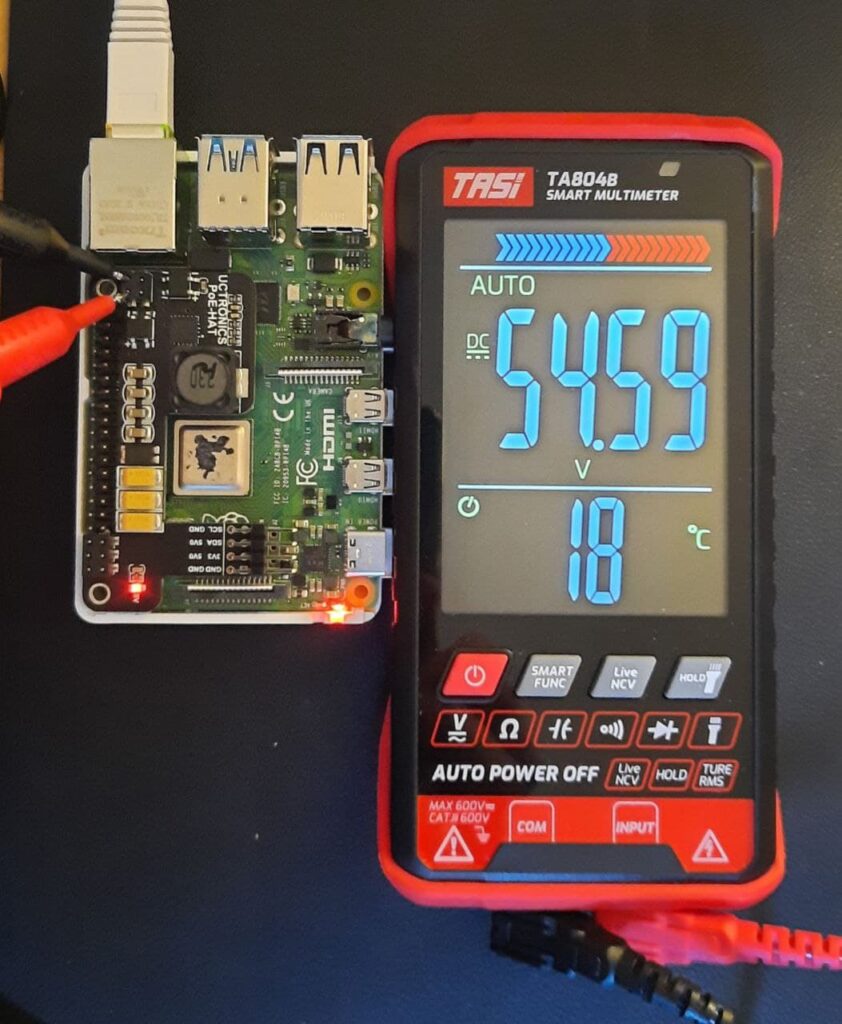
Warning ! As you can see, the PoE supply voltage is not 5 V, it is generally between 48 V and 55 V. You should therefore not supply the Raspberry Pi directly via the pins of its J14 connector (PoE). It is essential to use a PoE HAT module, which will transform this voltage into a voltage of 5 V.
The main role of PoE HAT modules is to transform the PoE voltage (about 50 V) into 5 V to power the Raspberry Pi.
Tutoduino.fr
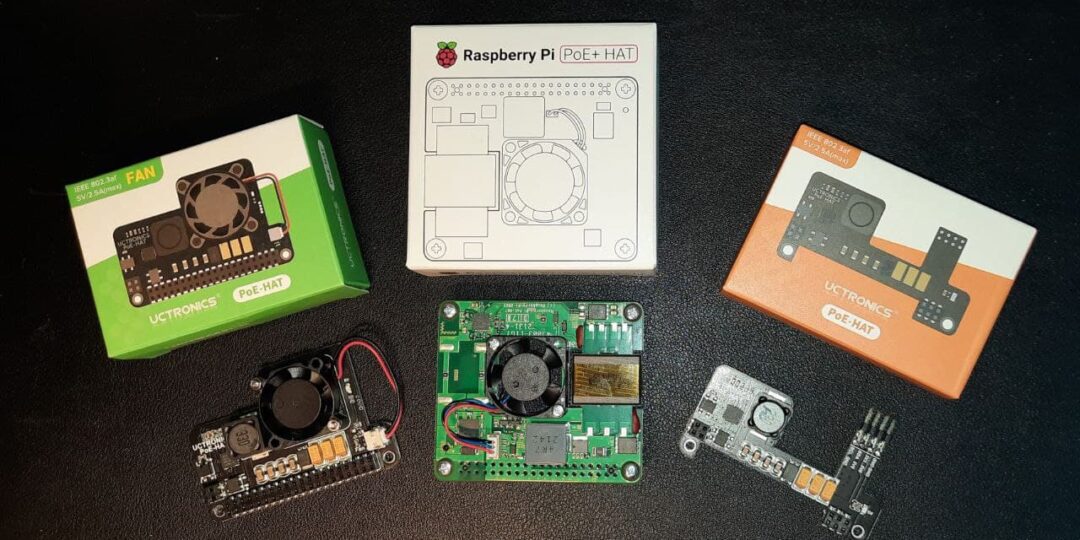
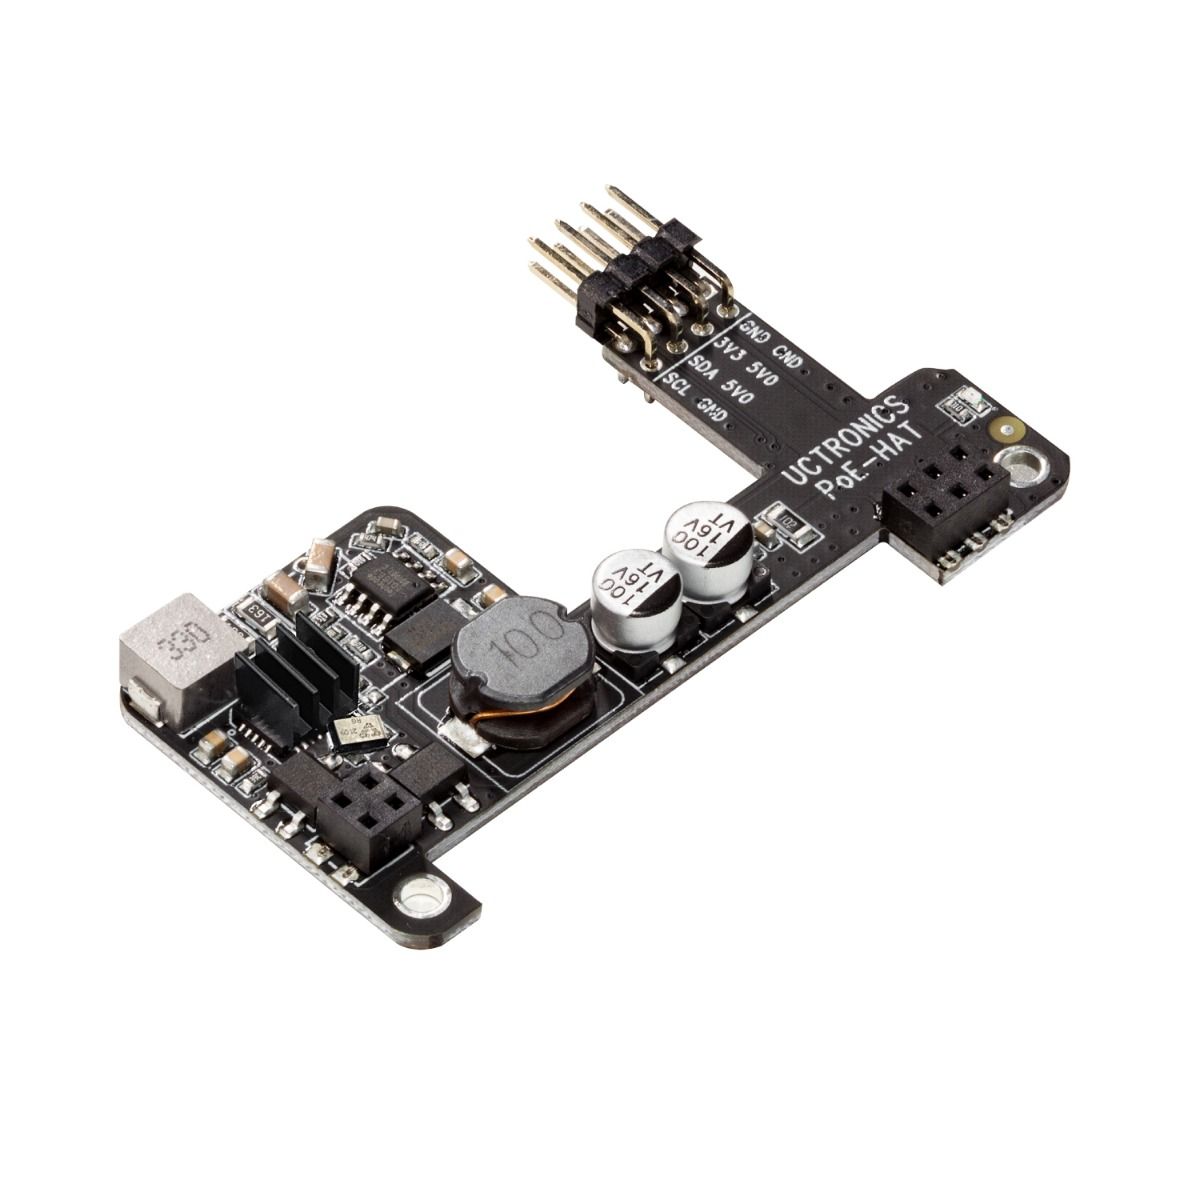
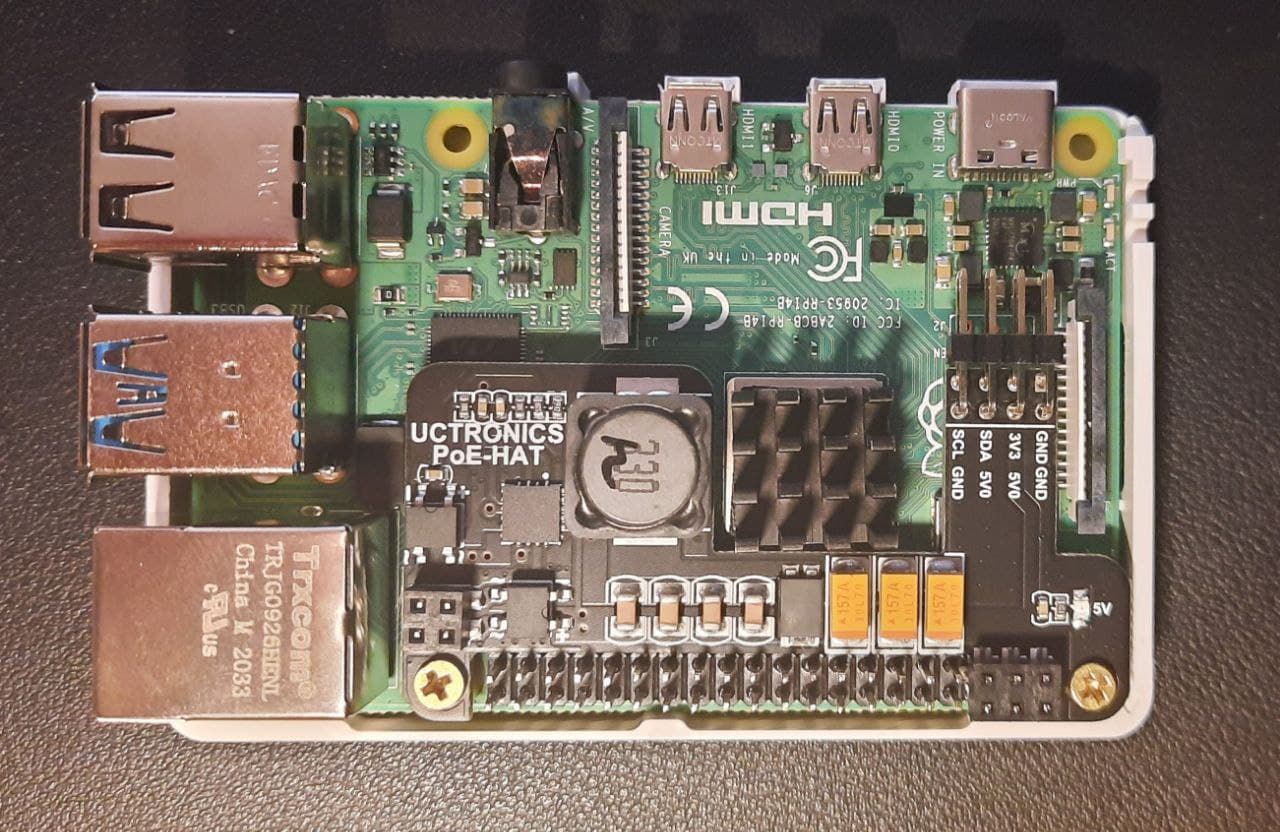
UCTRONICS PoE-HAT
The UCTRONICS PoE-HAT does not include a fan, but its design allows you to position a heat-sink on the CPU of the Raspberry Pi 4.
Its advantage (and it is a HUGE advantage!) is that it allows the use of most of the GPIOs of the Raspberry Pi.
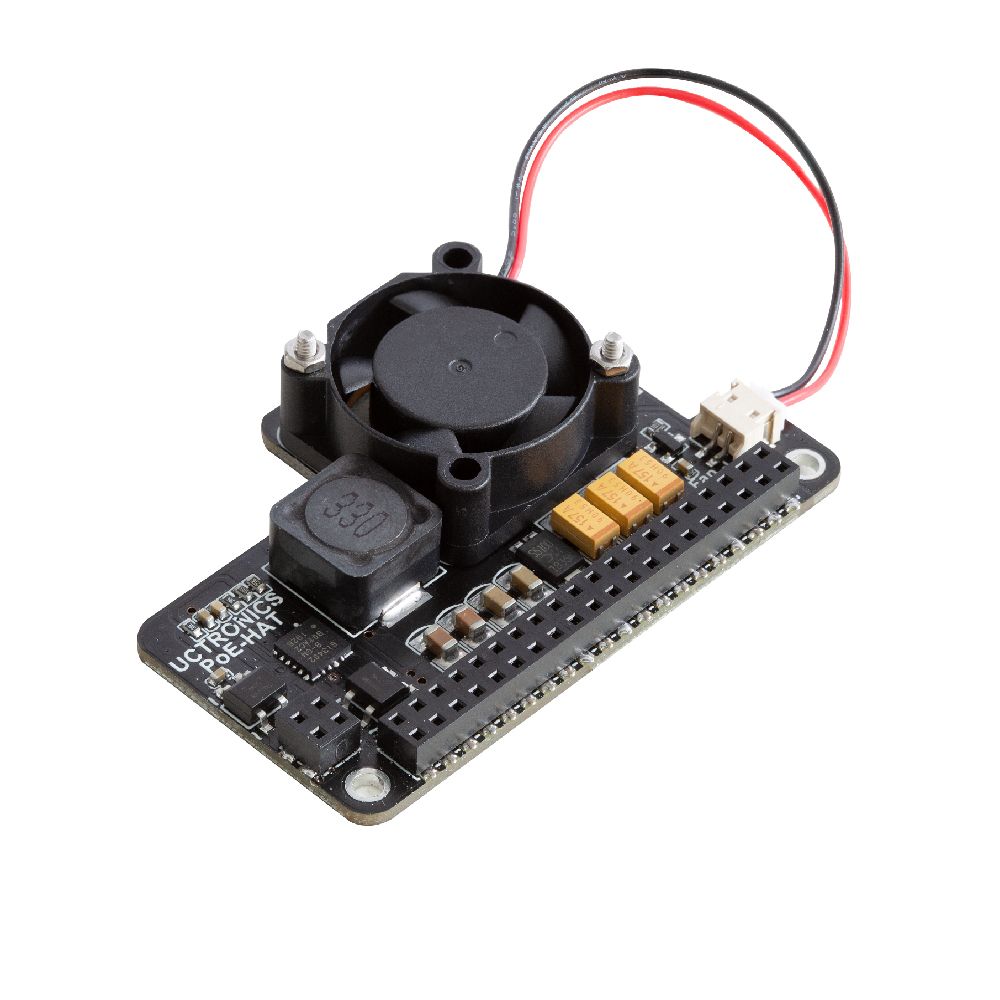
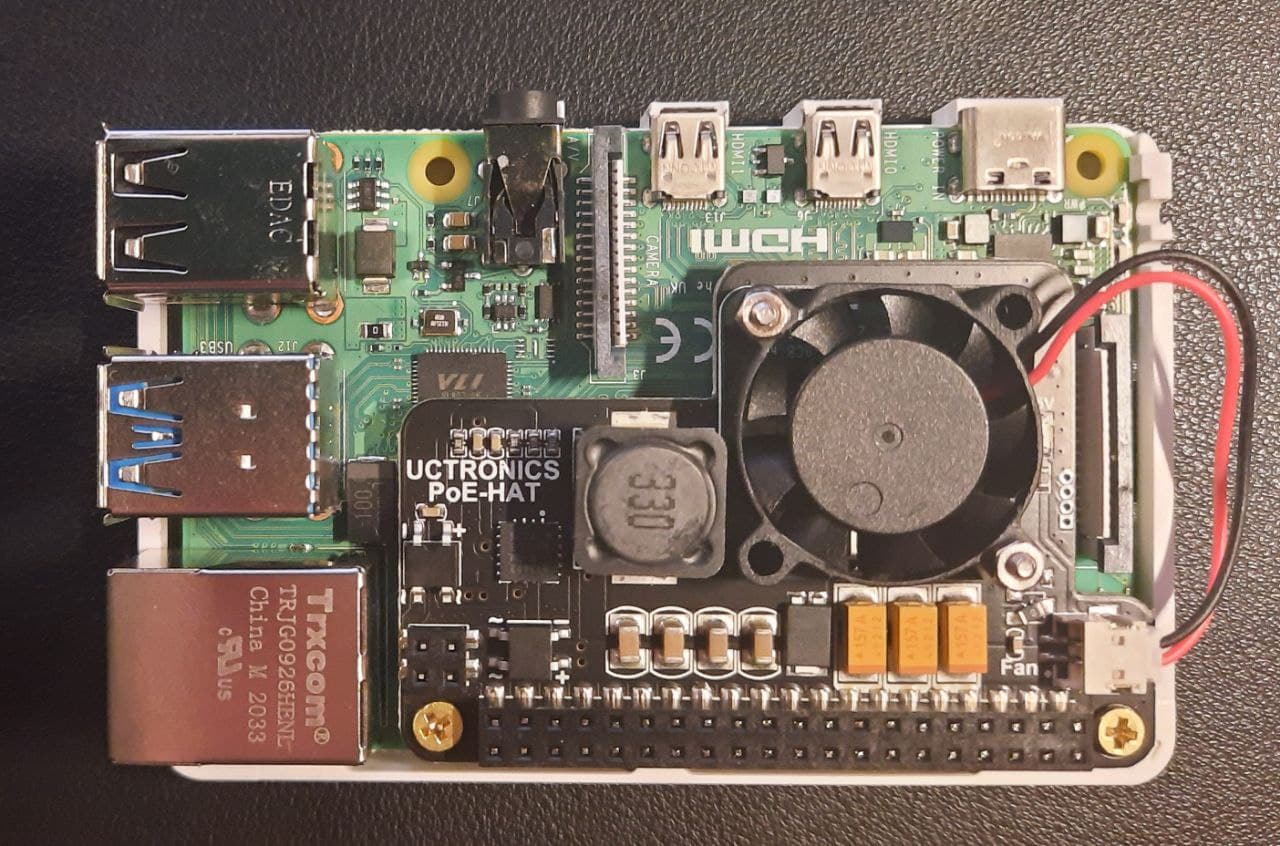
UCTRONICS PoE-HAT FAN
The UCTRONICS PoE-HAT FAN embeds a small fan that effectively cools the Raspberry Pi.
The fan is quite noisy and its speed cannot be controlled. It runs constantly, even when the Raspberry Pi is turned off. The fan also works when the Raspberry Pi is powered by the USB socket.
The advantage of this HAT is that its design is compatible with the majority of cases.
Its major drawback is that the GPIOs of the Raspberry Pi are no longer accessible.
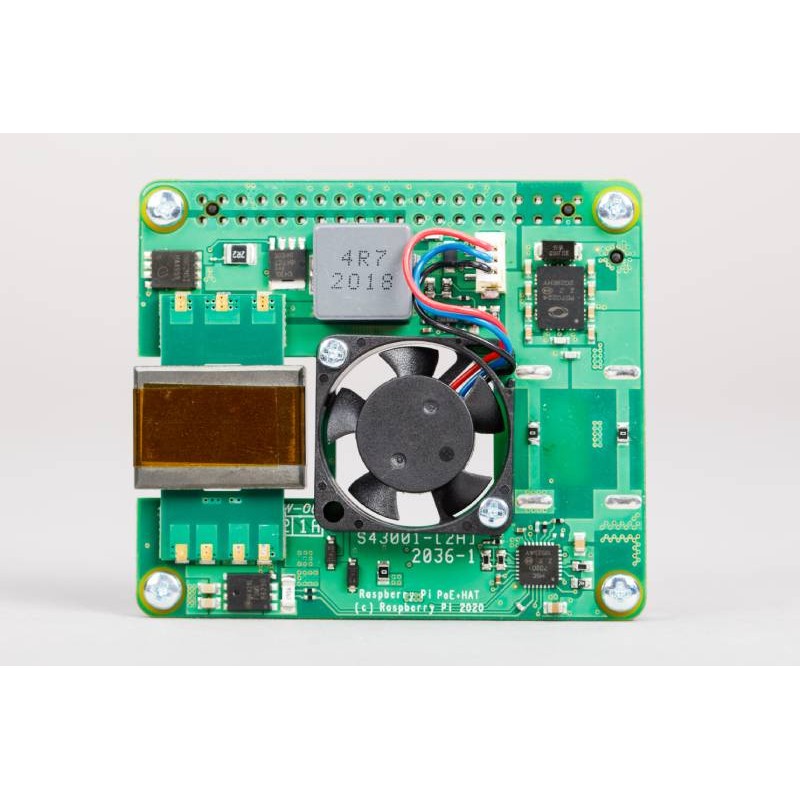
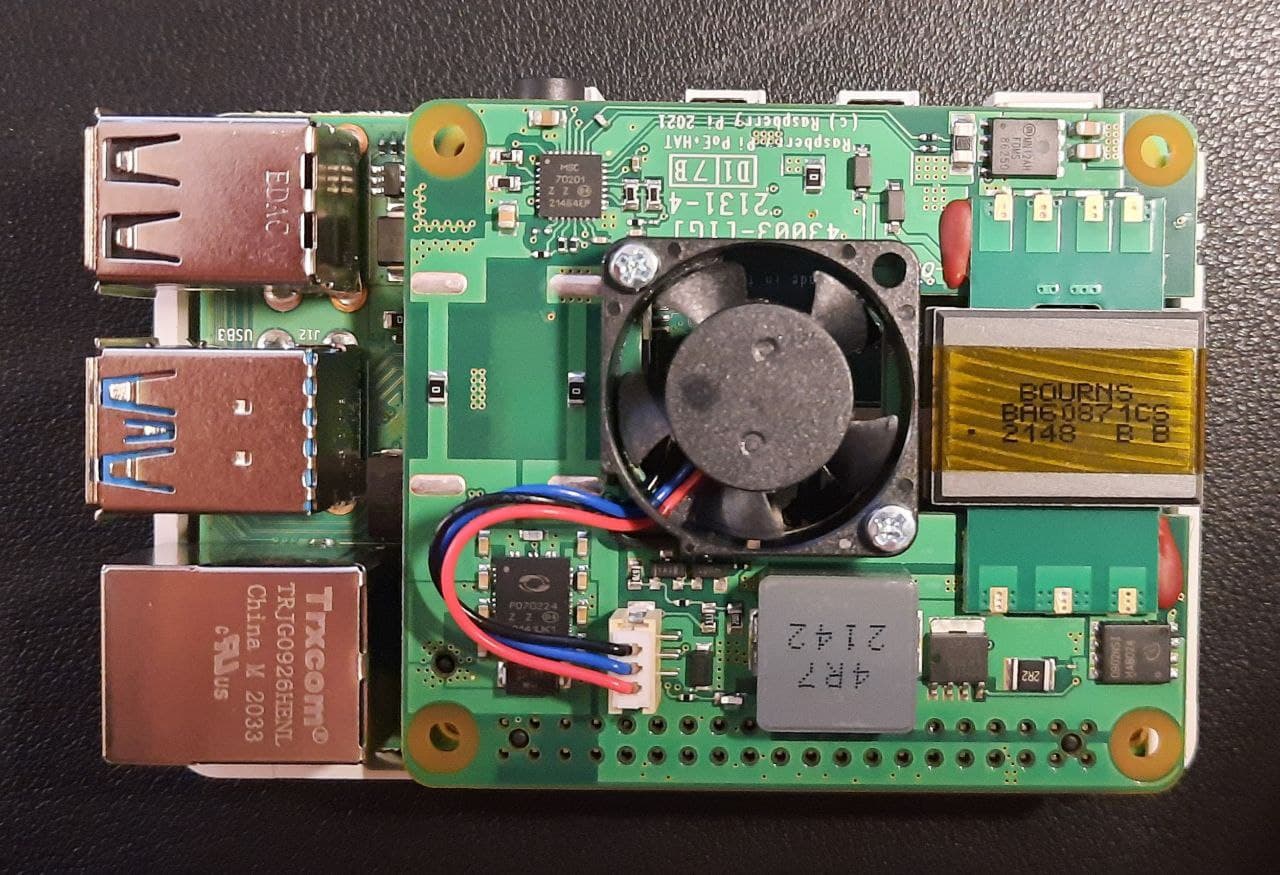
Raspberry Pi PoE+ HAT
The PoE+ HAT from the Raspberry Foundation is compatible with the PoE+ standard. This standard makes it possible to deliver up to 30 W, twice that of PoE. But knowing that the Raspberry Pi 4 will consume a maximum of 12.75 W(1) the PoE should be sufficient.
This PoE+ HAT is equipped with a regulated and fairly discreet fan. When the CPU is loaded the fan gets a little louder, but it keeps the CPU temperature below 50°C. When the Raspberry Pi is turned off, the fan stops.
Note that the fan of course also works when the Raspberry Pi is powered by its USB socket.
The only drawback of this PoE+ HAT is that it blocks the use of the Raspberry Pi’s GPIOs and that its fan does not fit in all cases.
Cooling efficiency
This table compares the CPU temperature of the Raspberry Pi 4 equipped with the different PoE HATs. This test is performed with a CPU load of around 25% and no equipment connected to the GPIO and USB ports.
| UCTRONICS PoE-HAT | UCTRONICS PoE-HAT FAN | Raspberry PoE+ HAT | |
|---|---|---|---|
| CPU temperature loaded at 25% for 5 minutes | 62°C | 39 °C | 49 °C |
Conclusion
There really isn’t a PoE HAT that stands out at the top of this comparison. Each PoE HAT has its own pros and cons. The choice will be made according to your needs (compatibility with the boxes, silence of the fan, power of the power supply, access to the GPIOs, etc.).
Here is a summary table to help you in your choice:
| UCTRONICS PoE-HAT | UCTRONICS PoE-HAT FAN | Raspberry PoE+ HAT | |
|---|---|---|---|
| Compatibility with most cases | Yes | Yes | No |
| Built-in fan | No | Yes but noisy | Yes |
| Allows access to GPIOs | Yes | No | No |
| PoE+ support (30W) | No | No | Yes |
In a completely personal way and for my daily use, I opted for the use of the UCTRONICS PoE-HAT with my Raspberry Pi 4. The silence of operation and the access to the GPIOs being my criteria of choice.
(1) The Raspberry Pi 4 consumes a maximum of 2.55 A, i.e. 12.75 W at 5 V. Consumption is broken down as follows: 1.25 A for the Raspberry Pi itself, 1.2 A for the USB devices, 50 mA for GPIOs and 50 mA for HDMI) . Source https://www.raspberrypi.com/documentation/computers/raspberry-pi.html#typical-power-requirements
btw you can use most of the pins with the official raspberry pi hat also
You can use a stacking header which has longer pins so they’ll push through the holes at the top of the hat
Good evaluation, but it would be beneficial to mention that “most” GPIO pins are accessible. You lose 6 pins which makes it impossible to use a standard header extender to put a GPIO hat on top. With a AZdeliver-style GPIO multiplier, the 4 POE pins become inaccessible. With a Geeekpi 1 to 2 GPIO expansion, the 4 POE pins are not connected anymore because of the height, but a GPIO Female Socket Riser Header – 2×2 4-pin, can help there.
Thanks for your great comment, “most” has been added.