Seeed Studio recently released the COB Led Driver Board for XIAO devices. What is it for?
Let’s go back to basics: how do you light up an LED?
In my previous article, “Blink an LED with an Arduino“, you will find the fundamentals of how to light up an LED. LED emits light when a current flows through them in the forward direction. The intensity of the current flowing in an LED must be between 5 and 20 mA depending on the desired luminosity. The stronger the current, the brighter the LED. But be careful not to exceed 20 mA so as not to destroy the LED.
What is a COB LED strip?
COB LED strips use Chip-On-Board (COB) technology, mounting numerous closely spaced LED chips directly on a flexible PCB for continuous, uniform illumination. Powered by low-voltage DC, current flows through the chips via copper traces.
COB LED Strip operate at low-voltage DC (3V for Seeed COB LED Strip), and has no built-in resistors. It must use current-controlled power supplies to safely limit total current flow through copper traces and protect its dense chip array from over-current and overheating.

Due to its design, Seeed COB LED strip are ultra-flexible and fully cuttable.
Reason for no built-in resistors
COB technology mounts hundreds of tiny LED chips directly onto the PCB in a continuous line, leaving no physical room for discrete resistors per chip or group, unlike SMD strips with spaced-out LEDs.
High-density chips generate concentrated heat, so manufacturers rely on external constant-current drivers, avoiding resistor heat losses that would worsen thermal hotspots in such compact arrays.
Current-controlled power supplies
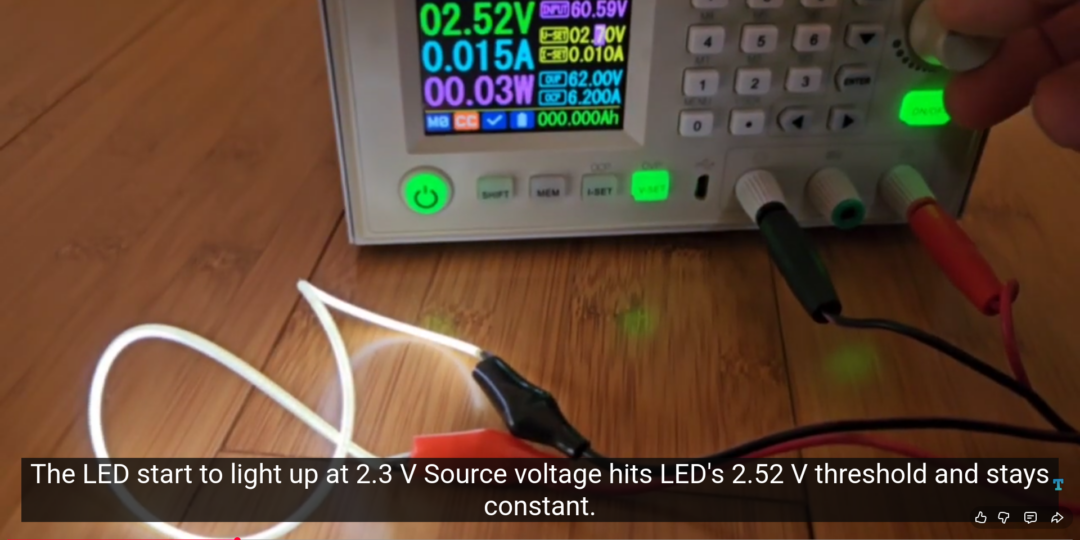
In the following video, I demonstrate current control for COB LED strips using a programmable generator.
I begin the test by setting the generator’s voltage limit to 2 V with a 10 mA current limit, then increase the voltage in 0.1 V steps. The LED lights up at 2.3 V, after which the source voltage stabilizes at the LED’s 2.52 V forward threshold despite further increases. Finally, I raise the current limit in 10 mA increments to 100 mA, during which LED brightness increases proportionally with current.
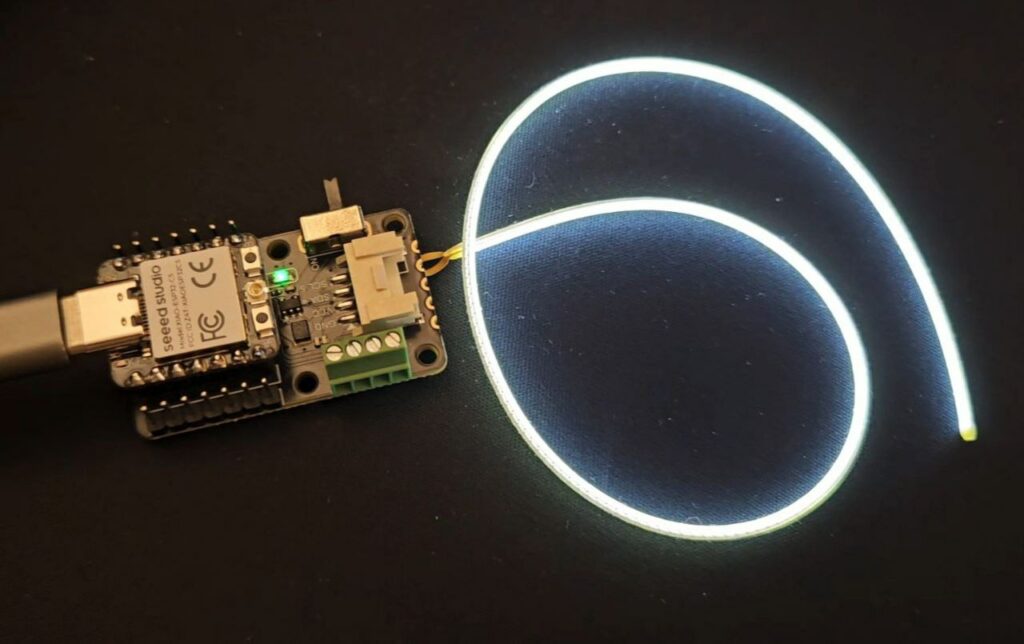
COB LED Driver Board for Seeed Studio XIAO
ESP32 GPIO pins are limited to 20-40 mA maximum, insufficient to directly power COB LED strips requiring 100-300 mA/m. The XIAO COB LED driver board overcomes these GPIO power limits with 7 dedicated output channels.
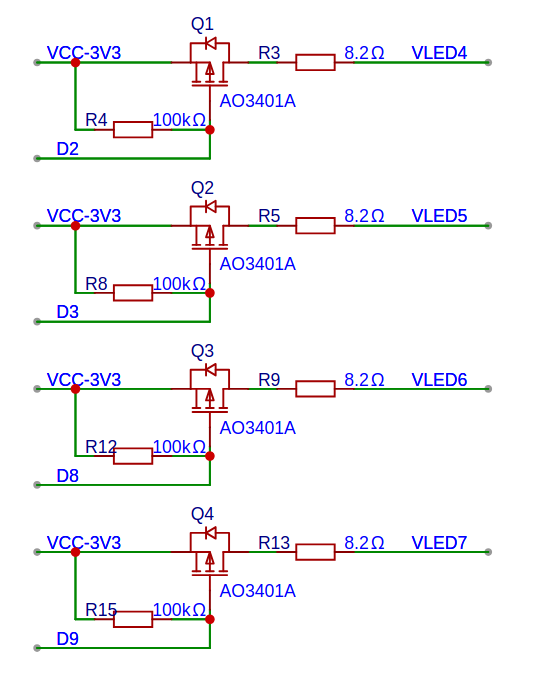
The 4 output channels (VLED4, VLED5, VLED6, VLED7) support full PWM dimming via XIAO ESP32-C5 pins D2, D3, D8, and D9 respectively, delivering up to 80 mA per channel through AO3401A P-channel MOSFETs.
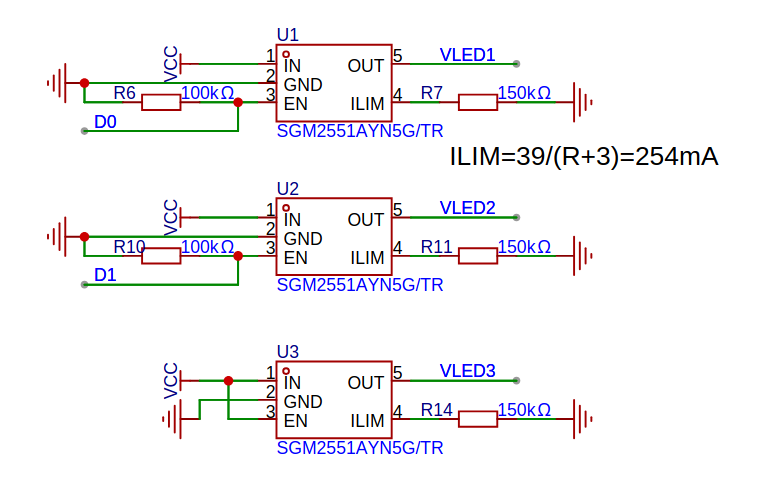
The 3 output channels (VLED1, VLED2, VLED3) use SGM2551A precision current-limited power switches to deliver up to 254 mA but cannot be dimmed. VLED1 and VLED2 are controlled by XIAO ESP32-C5 pins D0 and D1 respectively, while VLED3 lacks GPIO control.
Note that the high-power ports use standard digital logic where HIGH = ON, LOW = OFF, while the low-power ports use inverted PWM logic where 0 = full ON (100% duty cycle) and 255 = full OFF.
Example of Arduino sketch
The following Arduino sketch creates a breathing animation on the COB LED strip connected to the low-power port (PWM-controlled by pin D2 of ESP32) while simultaneously blinking the strip on the high-power port (controlled by pin D0 of ESP32, digital ON/OFF).
// Example for Seeed COB LED Driver Board
// https://tutoduino.fr/
// Copyleft 2026
// PIN_STRIP_0 is connected to D0 high-power port (not dimmable)
#define PIN_STRIP_0 D0
// PIN_STRIP_2 is connected to D2 low-power port (dimmable)
#define PIN_STRIP_2 D2
void setup() {
  // initialize pins as output
  pinMode(PIN_STRIP_0, OUTPUT);
  pinMode(PIN_STRIP_2, OUTPUT);
}
void loop() {
  int i;
  // Gradually fades in the dimmable COB LED on STRIP2 from off (255)
  // to full brightness (0) using PWM
  for (i=0; i<=255 ; i++) {
    analogWrite(PIN_STRIP_2, 255-i);
    delay(10);
  }
  // Gradually fades in the dimmable COB LED on STRIP2 from full brightness (0)
  // to off (255) using PWM
  for (i=0; i<=255 ; i++) {
    analogWrite(PIN_STRIP_2, i);
    delay(10);
  }
  // turn ON STRIP_0 (HIGH)
  digitalWrite(PIN_STRIP_0, HIGH);
  delay(500);
  // turn OFF STRIP_0 (LOW)
  digitalWrite(PIN_STRIP_0, LOW);

  delay(1000);
}
Here is a short video of such example using double-ended COB LED strip from Seeed Studio:
You can find complete example programs in the official Seeed Studio COB LED Driver Board Wiki.
[…] To learn more about COB LED, check my previous article introducing COB LED Driver Board. […]