Level = beginner
In this tutorial we will see how to use the DHT11 temperature and humidity sensor with an Arduino. This tutorial is suitable for beginners.
The DHT11 sensor
The DHT11 sensor measures temperature and humidity. The use of this type of sensor is interesting for a beginner because it makes it possible to measure a physical quantity accessible to all.
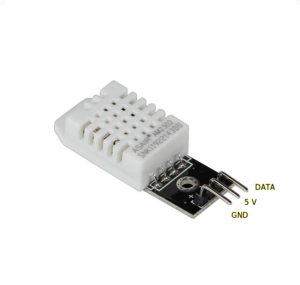
The DHT11 sensor has 4 pins, but is often sold on a carrier board which has 3 pins. It communicates with the Arduino very simply through one of its digital inputs. The other 2 pins are for its 5V supply and ground (GND).

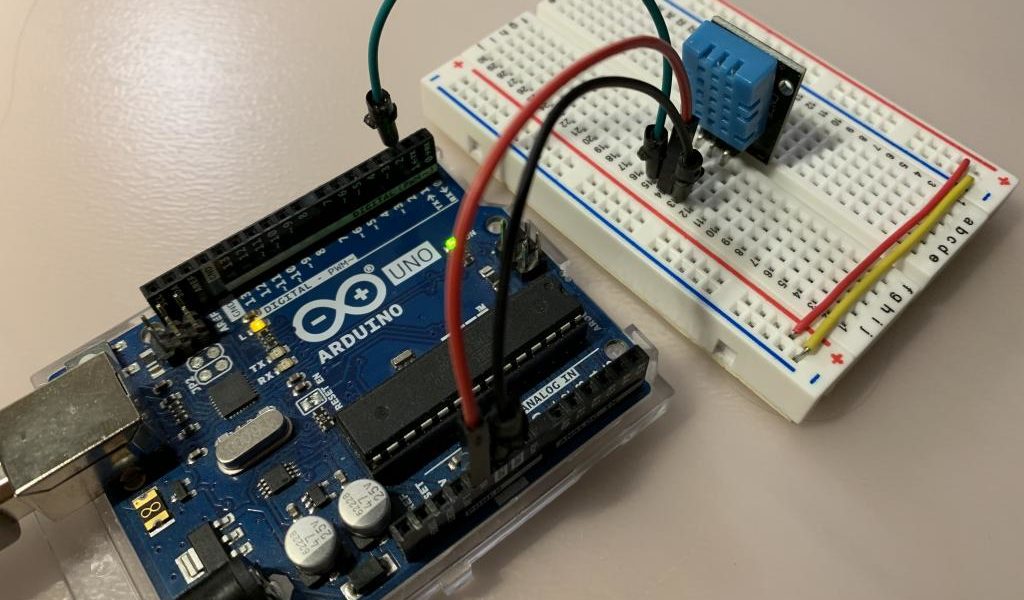
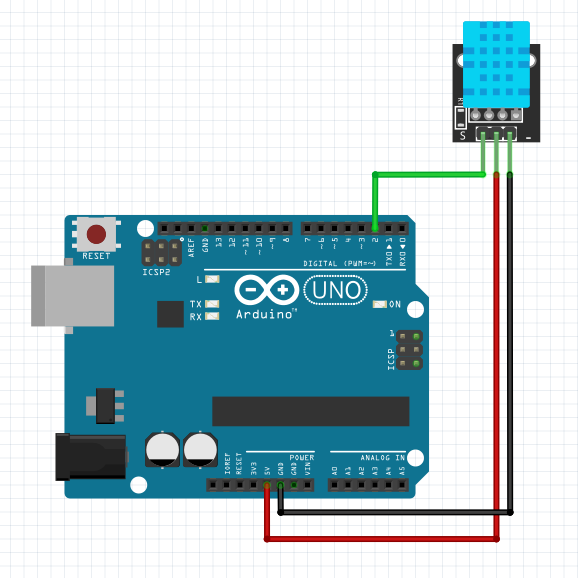
Wiring
The assembly is very simple, just wire the 5 V of the Arduino Uno on the 5 V pin, the mass of the Arduino Uno on the GND pin and the DATA pin of the sensor on the digital pin 2 of the Arduino One for example.
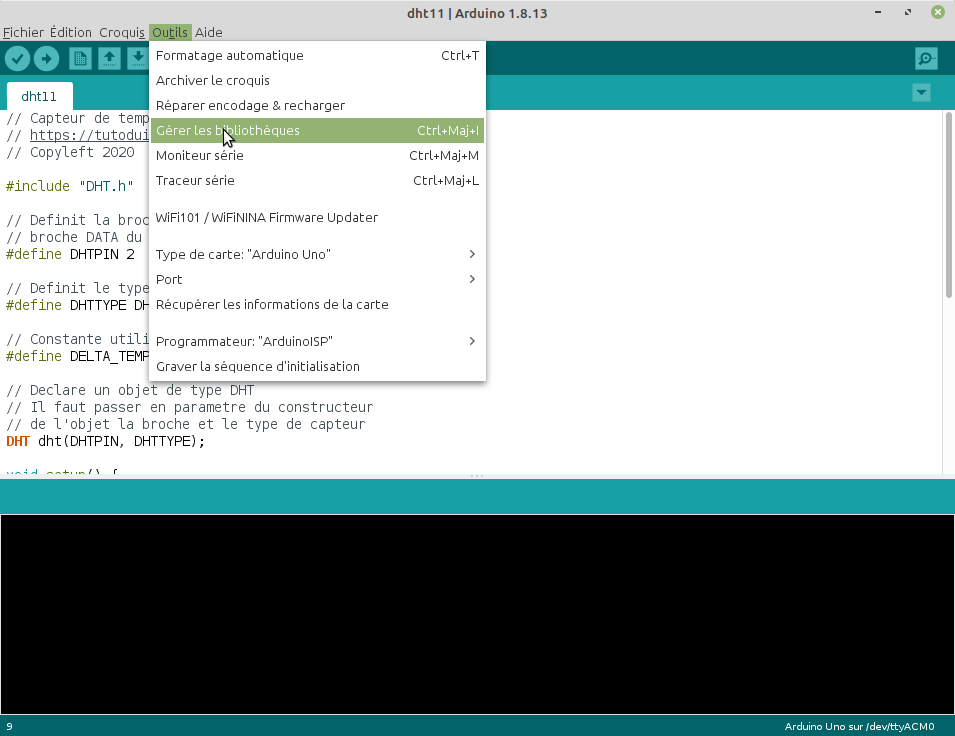
The “DHT sensor library”
In order to add a library to the Arduino IDE, go to the “Tools->Manage libraries” menu.
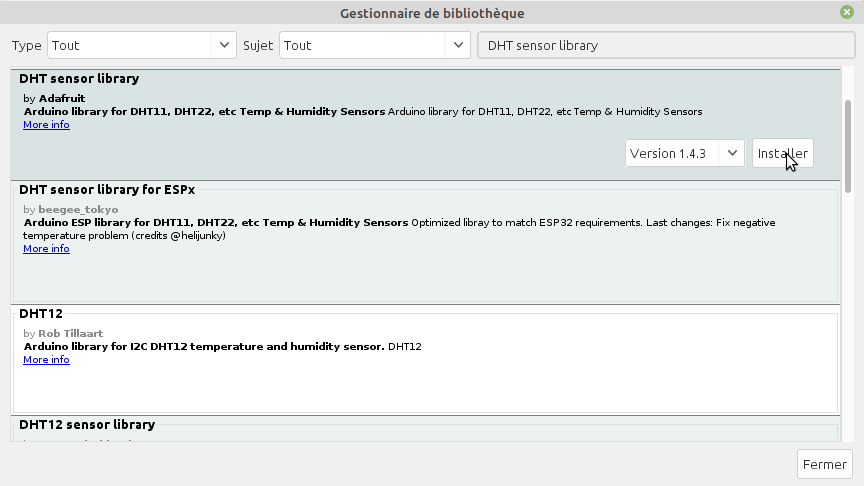
Then just search and add the “DHT sensor library” from Adafruit.
Sketch (program)
The sketch (program) of the Arduino is very simple thanks to this library “DHT sensor library”.
// Capteur de temperature et d'humidite DHT11
// https://tutoduino.fr/
// Copyleft 2020

#include "DHT.h"

// Definit la broche de l'Arduino sur laquelle la
// broche DATA du capteur est reliee
#define DHTPIN 2

// Definit le type de capteur utilise
#define DHTTYPE DHT11

// Declare un objet de type DHT
// Il faut passer en parametre du constructeur
// de l'objet la broche et le type de capteur
DHT dht(DHTPIN, DHTTYPE);

void setup() {
  Serial.begin(9600);

  // Initialise la capteur DHT11
  dht.begin();
}

void loop() {
  // Recupere la temperature et l'humidite du capteur et l'affiche
  // sur le moniteur serie
  Serial.println("Temperature = " + String(dht.readTemperature())+" °C");
  Serial.println("Humidite = " + String(dht.readHumidity())+" %");

  // Attend 10 secondes avant de reboucler
  delay(10000);
}
The display of temperature and humidity is done on the serial monitor of the Arduino.

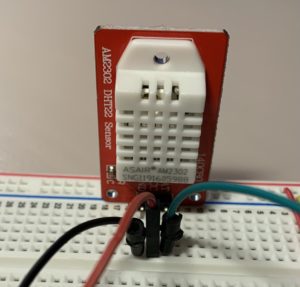
The DHT22 sensor
The DHT22 sensor is very similar to the DHT11, but it offers better measurement accuracy (± 0.5°C).
Care must be taken because the wiring of the DHT22 module is different from the DHT11. The GND and DATA pins are reversed on these two modules.
Otherwise the programming is identical, just change the part of the code:
#define DHTTYPE DHT11into:
#define DHTTYPE DHT22Calibrate the temperature sensor
I noticed that the calibration of the sensors was often quite bad, it may be useful to use a reference thermometer and apply a correction to the measurement returned by the sensor. The use of a dedicated variable will allow this calibration value to be easily modified from one sensor to another. Moreover it is not a variable but a #define because it saves memory on the Arduino compared to the use of a variable.
// Capteur de temperature et d'humidite DHT22
// https://tutoduino.fr/
// Copyleft 2020

#include "DHT.h"

// Definit la broche de l'Arduino sur laquelle la
// broche DATA du capteur est reliee
#define DHTPIN 2

// Definit le type de capteur utilise
#define DHTTYPE DHT22

// Constante mesuree avec un thermometre de reference
// qui sert a etalonner le capteur de temperature
#define DELTA_TEMPERATURE 0.7

// Declare un objet de type DHT
// Il faut passer en parametre du constructeur
// de l'objet la broche et le type de capteur
DHT dht(DHTPIN, DHTTYPE);

void setup() {
  Serial.begin(9600);

  // Initialise la capteur DHT11
  dht.begin();
}

void loop() {
  // Recupere la temperature et l'humidite du capteur et l'affiche
  // sur le moniteur serie
  Serial.println("Temperature = " + String(dht.readTemperature() - DELTA_TEMPERATURE)+" °C");
  Serial.println("Humidite = " + String(dht.readHumidity())+" %");

  // Attend 10 secondes avant de reboucler
  delay(1000);
}
To go (much) further
If you want to use this sensor in a real project, I invite you to take a look at my tutorial “Wireless temperature and humidity sensor”.